Pink & Burgundy Makeup Tutorial | Feat. M.A.C Liquid Lipstick

I recently purchased a few Colourpop cosmetics eyeshadows and I was also able to get my hands on one of the new M.A.C Liquid Lipsticks in the color High Drama. I wanted to use it so bad in a tutorial that I decided to create something with the lippie and the new eyeshadows I purchased. I hope you guys like this tutorial, please subscribe if you do. Also, let me know if you guys want a review on the M.A.C Liquid Lipstick.

PRODUCTS USED:

M.A.C Paint Pot in Painterly

Kat Von D Shade & Light Eyeshadow Palette ( Sytry)

Urban Decay Vice 4 Palette (Underhand, Framed)

Colourpop Cosmetics Eyeshadow (Bubbly)

Anastasia Beverly Hills Amrezy Palette (Deep Plum, LBD)

Benefit They’re Real Push Up Liner

Sonia Kashuk Eye Liner

Kat Von D Lock It Tattoo Foundation

NYX Dark Circle Corrector

NARS Radiant Creamy Concealer

Ben Nye Banana Powder

M.A.C Studio Fix Powder (NW35)

NYX Matte Bronzer

M.A.C Prolonger Blush (Stubborn)

Becca Cosmetics x Jaclyn Hill Highlight (Champagne Pop)

YSL Babydoll Mascara

Ardell Lashes (Demi Whispies)

M.A.C Eyeshadow (Nylon)

M.A.C Lip Liner (Nightmoth)

M.A.C Liquid Lipstick (High Drama)

IMG_2952

What other videos would you guys like to see from me?

xo, Jess

First Impression | Covergirl TruBlend Foundation ♥

It has been almost a whole month since I’ve posted anything on here and I sincerely apologize for that! I don’t like to give excuses for my actions but in all seriousness, I was sick for about a week and a half and then went on vacation (a cruise) for eight days, so that explains my absence. Thankfully, I am feeling better and I’m tan so we can get back to our regularly scheduled program!

This is actually the first time I’m doing a “First Impressions” video/post so bare with me. Since I went on vacation I ended up getting a tan and I am probably 2-3 shades darker than my normal skin color which is crazy! I haven’t been this tan since I was about 15 and lived in Florida (I used to lay out and tan almost everyday with my niece). Because of this gorgeous tan I’m rocking, none of my foundations match so I was walking around looking like Casper, which is never a good thing. My friend was telling me how she picked up this new foundation and was loving it so I decided, hey why not! I didn’t want to spend too much money on a foundation that would only be used 3-4 months out of the year so this was perfect!

* If you want to see how it applies and what it looks like on, check out the video. The rest of this post is more details on the actual product itself.

Covergirl Trueblend Foundation

Price: $8.99- $9.99 depending on where you buy it.

Where Can You Purchase: Rite Aid, Ulta, Wal-Mart, & most other drugstores.

Covergirl Claims: “truBLEND Liquid Makeup is available in 21 shades and features a new shade matching system. To find your perfect blend, first determine your shade family. Second, choose your number. Coordinate complementary truBLEND products based on your number for a seamlessly flawless nude look that blends in and virtually disappears.” – Covergirl.com

Consistency: In this area I definitely give this foundation an A+. It is meant to be a liquid foundation and it certainly is. Covergirl claims that this foundation will blend in and virtually disappears and it sure does. It literally feels like you have nothing on your face,  which for me is a plus. I have so many foundations that I love but feel so heavy on my face and this one doesn’t feel heavy at all, it is such a thin consistency that it really does melt right into your skin.

Coverage: I believe this is a medium to full coverage foundation. It’s such a thin consistency that you wouldn’t expect it to be full coverage but it is definitely buildable. I applied it with my Beauty Blender and it gave me medium coverage, I liked how it looked so I left it that way but I could’ve easily added another layer without it looking cakey.

Finish: Initially I thought this was a matte finish foundation but I had used a mattifying primer so that wasn’t very helpful. As I continued to try the foundation different ways I begain to realize it actually has a sheen to it. It’s not completely matte but not completely dewy either. If you set it, it will definitely look more matte but if you leave it alone it can give you a glowy/dewy type finish. I’m pretty sure if you were to apply it with a brush it would instantly give a more full coverage look, since the Beauty Blender is damp it tends to thin out foundations sometimes.

Overall Thoughts: Overall, I am really loving this foundation. It just looks so natural and feels so light on my skin. I love that I can either make it dewy or matte. Also, there is a pretty wide variety of colors so whether you have fair skin or dark skin you can most likely find your match. I truly believe this foundation is perfect for summer, as it has great coverage and is very light. If you haven’t tried it, I totally recommend it!


IMG_0215

xo, Jess ♥


Brittany Sky | Orange Inspired Makeup Tutorial ♥

The other day I was scrolling through Instagram and happened to come across @brittanysky ‘s Instagram page. I decided to go through it and look at her pictures, she’s very beautiful and her makeup was gorgeous! If I’m correct, I believe she is a model but I’m not 100% sure. Anyway, After pretty much stalking her page for a good 30 minutes, I decided to screen shot one of her pictures and recreate her makeup look.

I’m always a sucker for color. Any type of color, so when I saw her bright orange eyeshadow I was automatically attracted to it! Unfortunately, I didn’t have a bright orange eyeshadow that was as bold as hers so I decided to make my recreation a little more wearable for you guys.

This look is something I would definitely wear in the summer, It just gives you this beautiful natural glow! Ughh love!

I hope you guys enjoy this look as much as I did recreating it 🙂 Tag Brittany Sky if you can so she can see too! (Please!) and of course like always, if you enjoy this video please share with your friends, comment, like, and subscribe to my youtube channel!

20140501-144832.jpg

20140501-144842.jpg

20140501-144853.jpg

20140501-144902.jpg


PRODUCTS USED:

♥ Too Faced Shadow Insurance
♥ Maybelline Color Tattoo (Fierce and Tangy)
♥ Lorac Pro Palette (Mauve, Sable, Espresso, Black)
♥ MAC Eyeshadow ()
♥ Sonia Kashuk Twist Up Longwear Eyeliner (Onyx)
♥ Motives Cosmetics Liquid Eyeliner
♥ Maybelline Clump Crusher Mascara
♥ Tarte Gifted Amazonian Clay Smart Mascara

♥ Maybelline Baby Skin Instant Pore Eraser Primer
♥ Makeup Forever HD Foundation
♥ MAC Pro longwear Concealer
♥ Too Faced Primed and Poreless Powder
♥ Ben Nye Banana Powder
♥ Anastasia Beverly Hills Contour Kit (Havana)
♥ Sonia Kashuk Chic Luminosity Bronzer
♥ Tarte Amazonian Clay 12-hr Blush

♥ MAC Lipstick (Creme ‘de Nude)
♥ NYX Butter Gloss (Tiramisu)

xo, Jess ♥

Long-Lasting Makeup 101 – Foundation ♥

If I had a Nickel for every time someone asked me how to make their foundation or makeup in general last longer, I would probably have enough money to own my own private island. No, but seriously. It took me forever to figure out how to make my foundation last all day, and even now I am still learning different techniques to use. The fun thing about makeup is that it is an ever-growing thing. There isn’t just one way of doing things or just one product to use for things. You can play around and make it your own. With that said, I figured I would write this post and try to explain how I make my makeup last, the things that I use, and little tips that I’ve learned along the way. Keep in mind, I am in no way an “expert” I don’t believe any makeup artist is, because like I said before, Makeup is an ever-growing thing. You make it your own with whatever works for you. These are tips and tricks that I use and have worked for myself and some friends and family,  so feel free to try these products, tips, and tricks, and let me know if they worked for you!

Skincare.

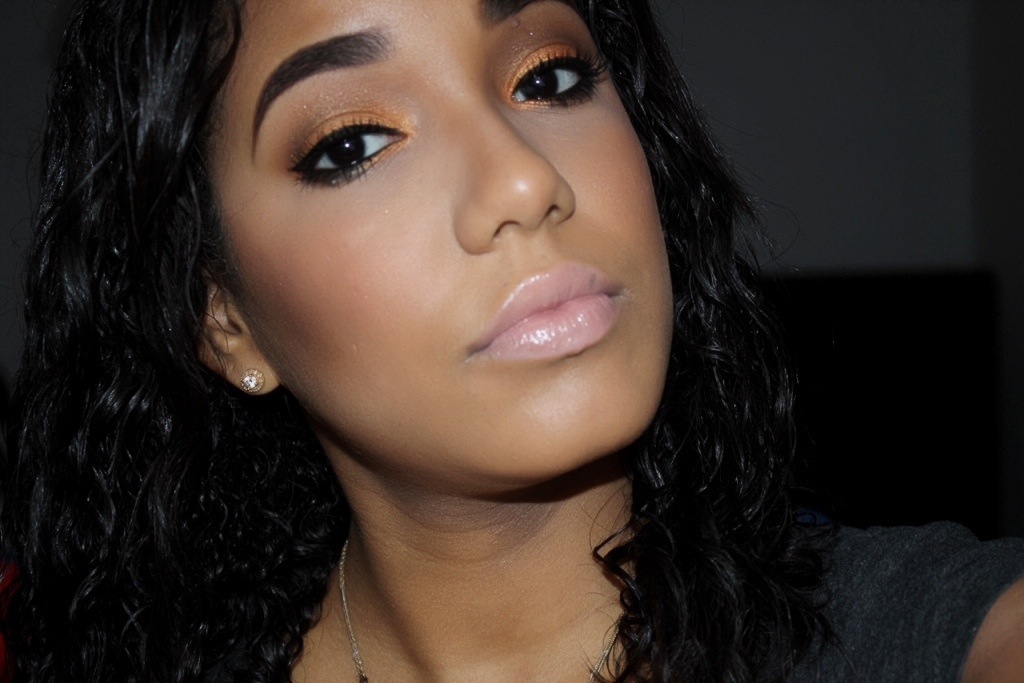
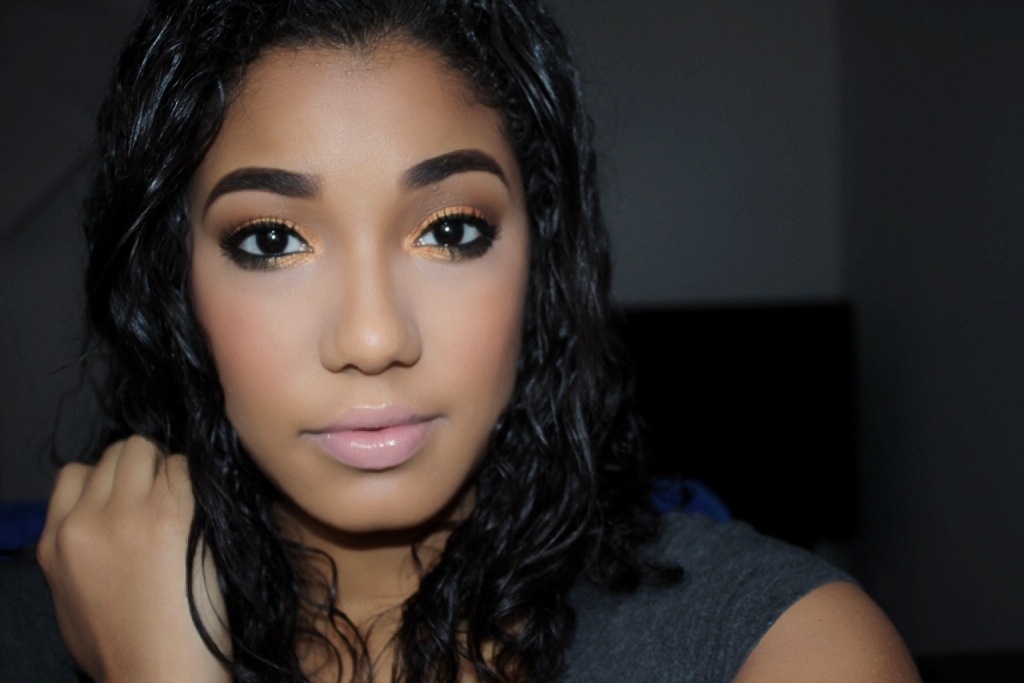
First and Foremost, Skincare is the most important part of makeup application. Just like an artist, you want to have an even blank canvas that you can paint on easily. Throughout the years I have noticed that when I wasn’t taking care of my skin, it would become either extremely oily or extremely dry depending on the weather/season. Now, for most of us that is normal, for me on the other hand, it was not. I would have little bumps all over my face, and a lot of the time my foundation would stick to dry patches but then slide off my face in other areas. With that said, I learned along the way that skincare was extremely important for makeup application, it just makes things so much easier and things look so much smoother.

Once you figure out whether you have oily, dry, or a combination of both skin types, your life gets that much easier. Trust me. You want to make sure that the face washes you are using are made for your skin type because many times it can dry out your skin, make it oily, give you acne, rashes, etc. So you definitely want to make sure you are using the proper type of face wash. Same goes for toners and moisturizers. If you have oily skin you still must moisturize just as much as us dry skin folks. If your skin is hydrated it is easier to apply makeup and have it last all day.

*Oils and serums can be your best friend as well, especially if you leave them on overnight. They can help repair the skin and help with hydration, wrinkles, collagen, etc.

I Use:
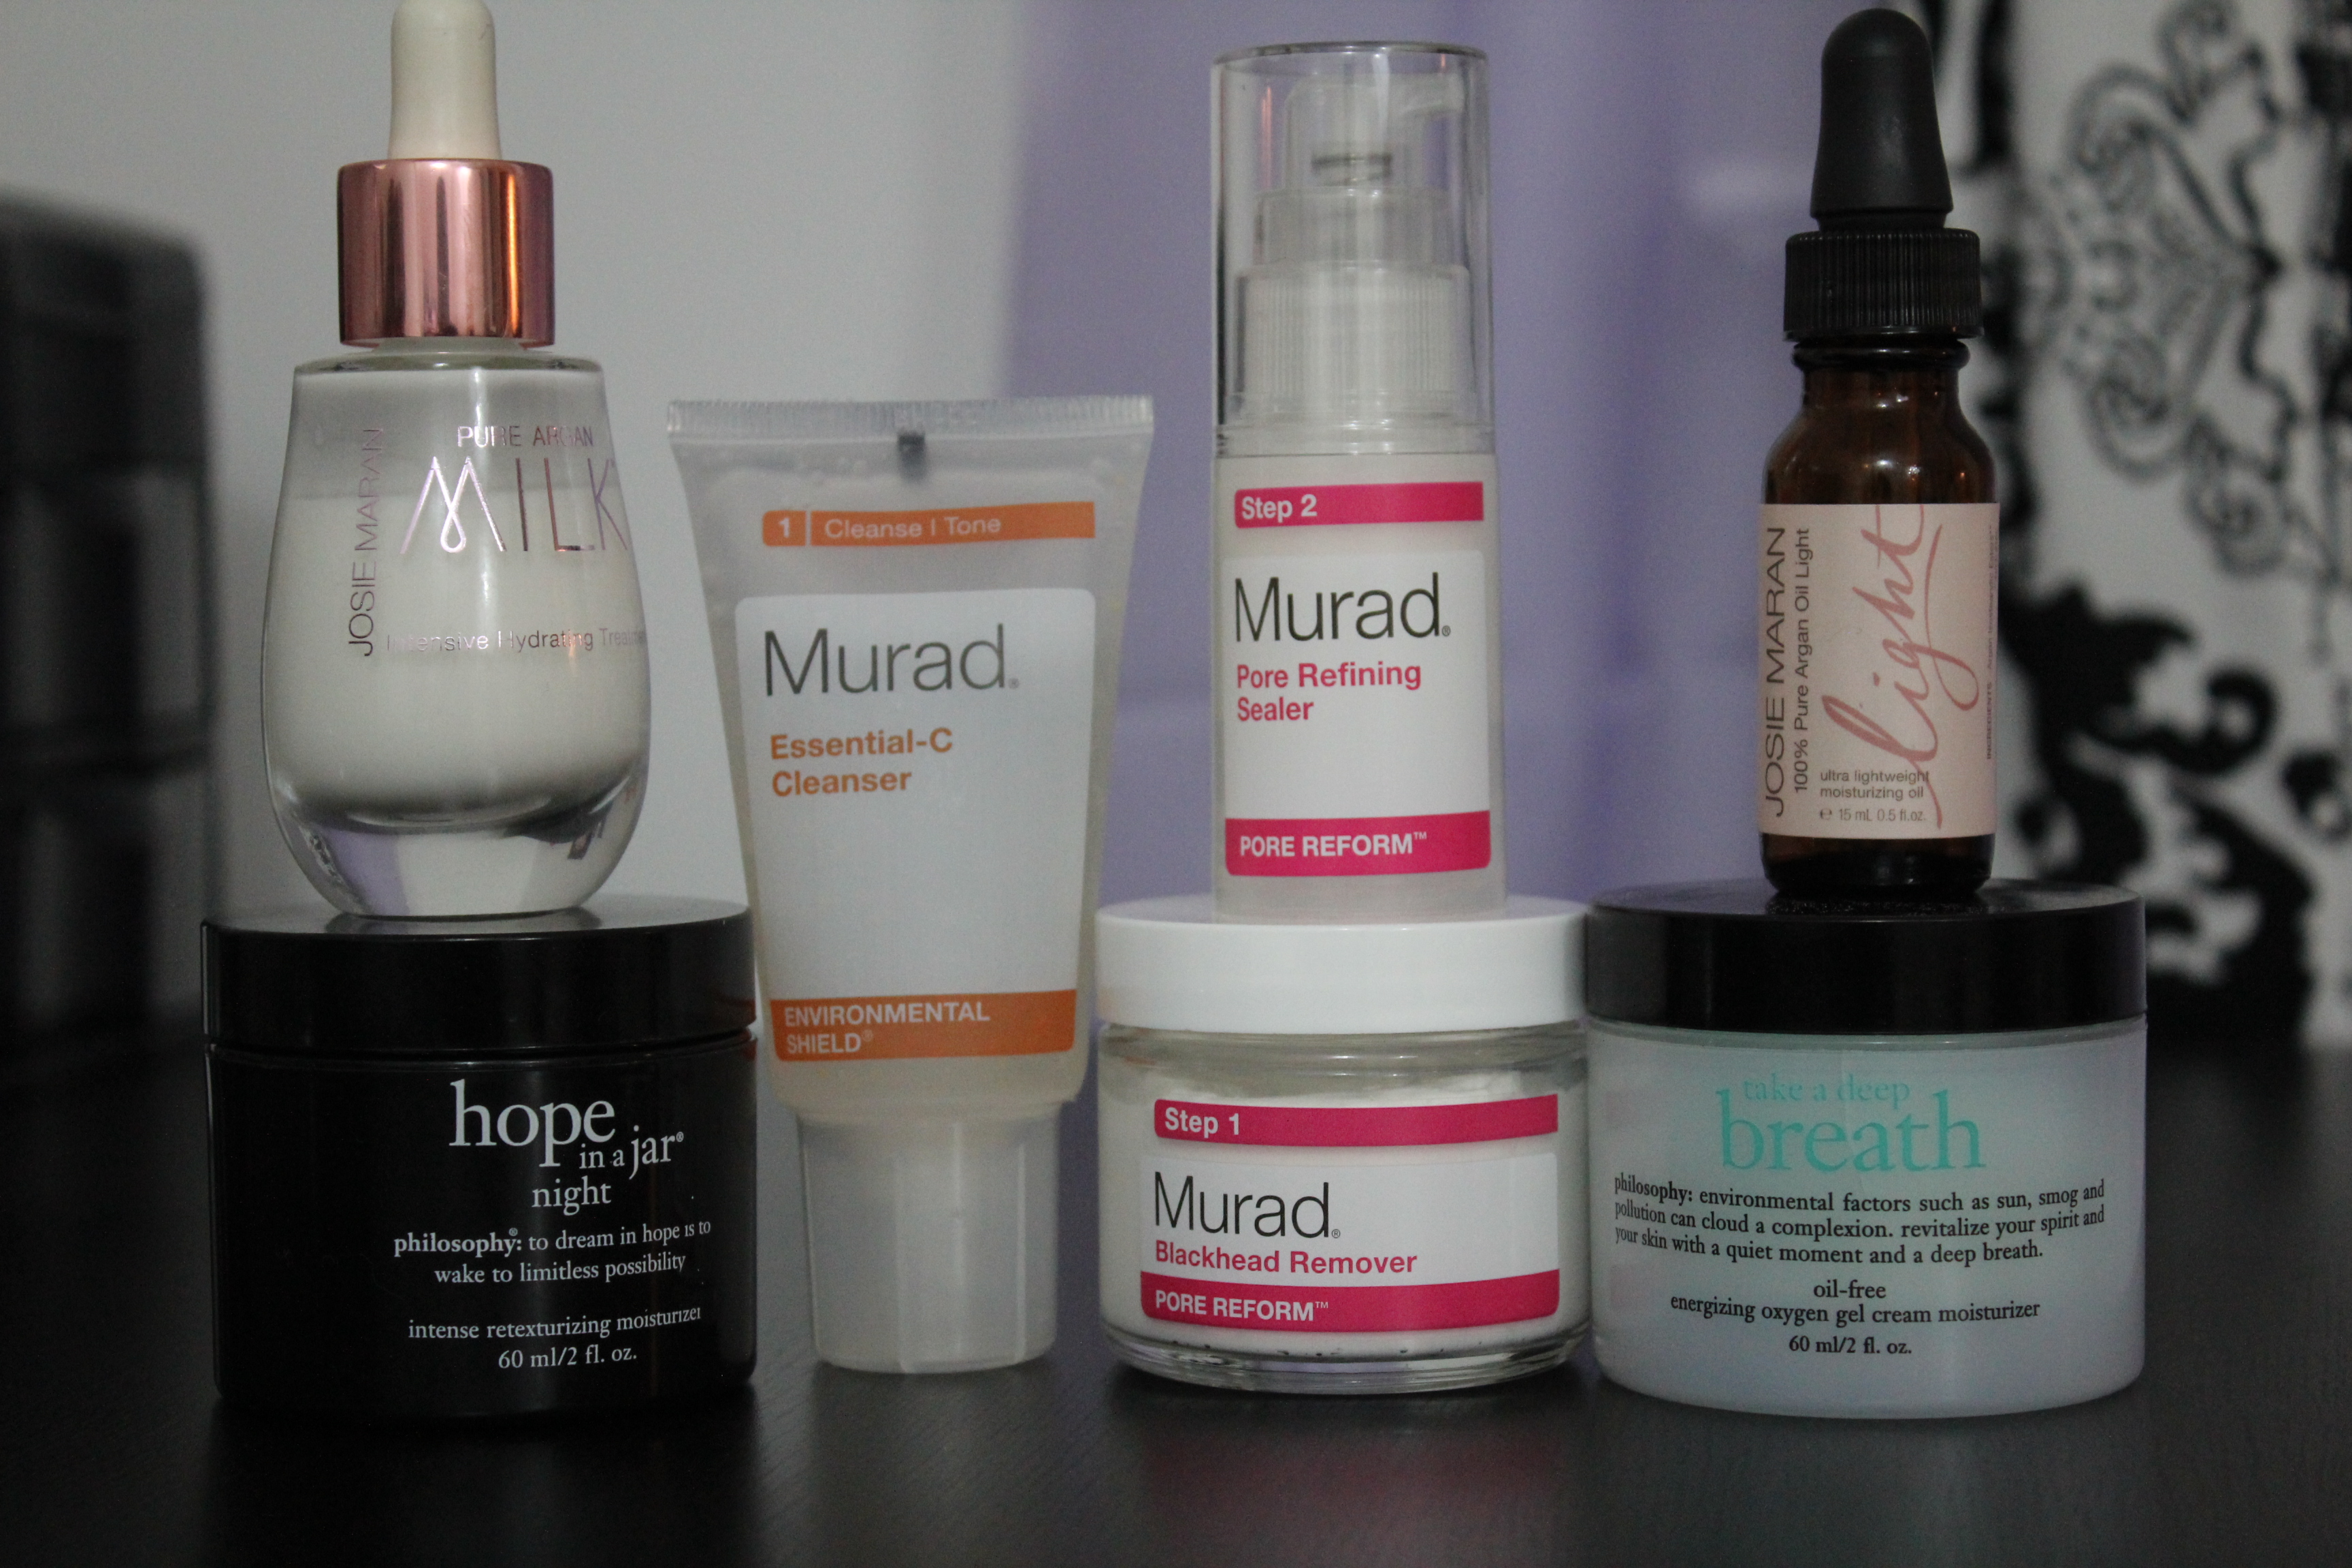
Murad Essential-C Cleanser
Murad Blackhead Remover
Philosophy Hope In A Jar Night Moisturizer
Philosophy Take A Deep Breath Gel Moisturizer
Josie Maran 100% Pure Argan Oil & Pure Argan Milk Intensive Hydrating Treatment

* My Skincare routine is not a set in stone routine, a lot of times your skin gets accustomed to the same products so I like to switch it up and see what works in the moment.

IMG_0642

Primer.

Before I get into the actual foundation process I want to quickly touch on primers. Some people don’t like primers and that’s fine, but for me I think it works wonders. I have very large pores so when I apply foundation you can pretty much see those pores right through any foundation, even if it is full coverage. When I apply a primer underneath my foundation not only does it help smooth my skin texture, but when using the right primer, it can help fill in pores and also help my foundation last longer. There are so many different primers out in the makeup world so try some out and see what fits best with your skin type. As of now, I can’t say I have any holy grail primers, but I do have a few favorites that I tend to go back to from time to time.

I Use:
Too Faced Primed & Poreless (Perfect for those of you with large pores, it minimizes them)
Sonia Kashuk Mattifying Primer (For those of you with oily skin, this is a must try)
Benefit Porefessional (Great for those with large pores, also helps with long lasting foundation & smooth skin).

*Primer is applied after moisturizer but before foundation.
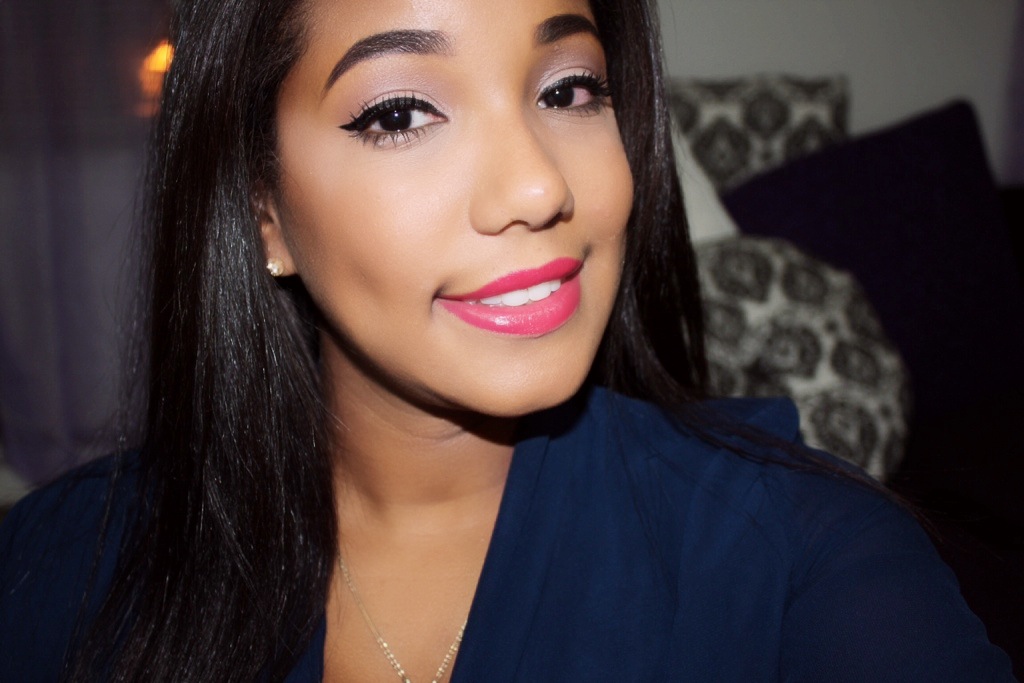
IMG_0645

Foundation.

There’s this misconception out in the makeup world that says any foundation is supposed to last all day with no touch ups. False. You’re going to have to touch up at least once and not all foundations are long wearing foundations. For those of you who want long-lasting foundation, you have to look for anything “long lasting” or “longwear”. Most foundations that I have personally tried don’t last more than 4-5 hrs without needing a touch up or just fully sliding off my face. When I do need a long lasting foundation I make sure to use the ones that are meant for that purpose.

I Use:
Revlon Colorstay Foundation (My first and forever love of foundations, literally stays on all day)
Makeup Forever HD Foundation (Perfect for photos and video)
MAC Studio Sculpt Foundation (or any MAC foundation in this case, they’re so great for full coverage long lasting foundations)

* Start with a light coat of foundation and gradually add more as needed to amp up the coverage. (If already full coverage foundation, be careful you can look cakey if you continue to add more to your first coat). Patting your foundation using a damp sponge or Beauty Blender rather than swirling it around with a brush helps the foundation settle into skin and helps get rid of any excess foundation that lays on top of your skin (also helps give you an airbrush finish).

Setting Powder.

Last but definitely not least, you want to finish your foundation application by setting it. Setting your foundation can also help make your foundation last longer, especially if you have oily skin. You can use a powder foundation (loose or pressed) or a translucent powder. If you want that little bit of extra coverage a powder foundation would be the way to go, if you feel you have enough coverage with your foundation alone then a translucent powder will work best.

I Use:
Urban Decay Ultra definition Loose Setting Powder (This stuff is amazing, I have a whole blogpost about it here)
Too Faced Primed and Poreless Powder (Translucent, great consistency, blurs pores and fine lines!)
Urban Decay All Nighter Long -Lasting Makeup Setting Spray (Best setting spray ever).

* lightly sweep the powder over your face with a large powder brush. A little goes a long way, you do not want to look powdery or cakey. Spritz a little setting spray to get rid of that powdery look and to also help set everything in place.

IMG_0654

These are basically all of my little tips and tricks and some of the products I’ve been using to keep my foundation lasting all day. I hope this was helpful and if you want to see a video of my foundation routine click here. (I have switched up a few products here and there but hopefully this helps).

xo, Jess♥